As someone who’s spent years exploring every corner of Roblox, from obbies to simulators to hangouts, I’ve always believed that voice chat adds a whole new level of fun and almost realism to the platform. It completely changes how we communicate, cooperate, and sometimes even troll our friends (in good fun, of course). But if you’ve ever tried enabling Roblox voice chat the official way, you know how frustrating it can be. ID verification? Uploading documents? Getting rejected even if you’re over 13? Yeah, I’ve been there too.
That’s why I want to walk you through a method that has worked for me and many others—one that skips the painful ID checks and gets you talking in-game in under a minute. Whether you’re new to the platform or just want a quicker workaround, this guide will break it all down step-by-step with no unnecessary complications.
How do I get voice chat on Roblox in 2025?
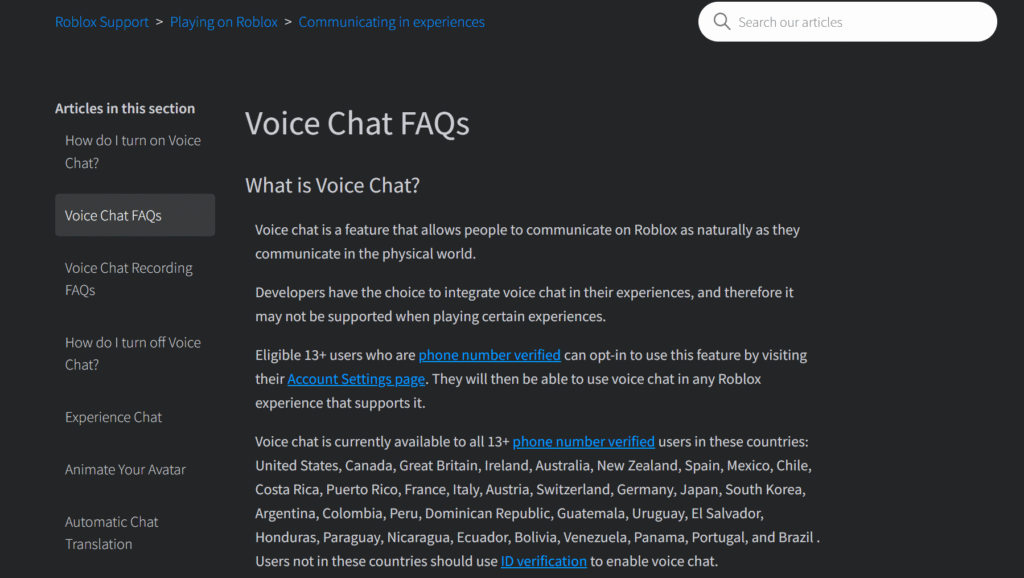
To get voice chat on Roblox in 2025, you’ll need to be logged into an account that meets the age requirement (13+), and have a verified phone number attached to that account. As long as your birth year is set to 2011 or earlier and you complete the basic phone number verification, Roblox will unlock voice chat automatically—without needing an official ID. The key is making sure your account is set up correctly before attempting to enable the feature.

Why This Method Works (And Why It’s Better)
A lot of players think voice chat is locked behind a strict wall of government ID scans and facial recognition. While that used to be the case, Roblox has slowly introduced less-invasive ways to verify you’re eligible. What most people don’t realize is that in many cases, a verified phone number is now enough—especially if your birthdate shows you’re over 13.
I discovered this after helping a friend who didn’t have an ID handy. We ran through the old steps, got stuck, and then realized that once we added a phone number, the voice chat setting simply… showed up. No confirmation email. No extra approvals. Just a quick login, phone number verification, and it was ready. That’s the method I’m about to show you.

Step 1: Open Your Roblox Account Settings
Once you’re logged into your Roblox account, look for the gear icon (⚙️) in the top-right corner of the page if you’re on desktop. On mobile, you can find settings under the three-dot menu. Click that and select “Settings” from the dropdown list.
Inside the settings panel, you’ll see tabs like Account Info, Security, and Privacy. Everything you’ll need is within those tabs.

Step 2: Check Your Account Age (It Must Be 13 or Older)
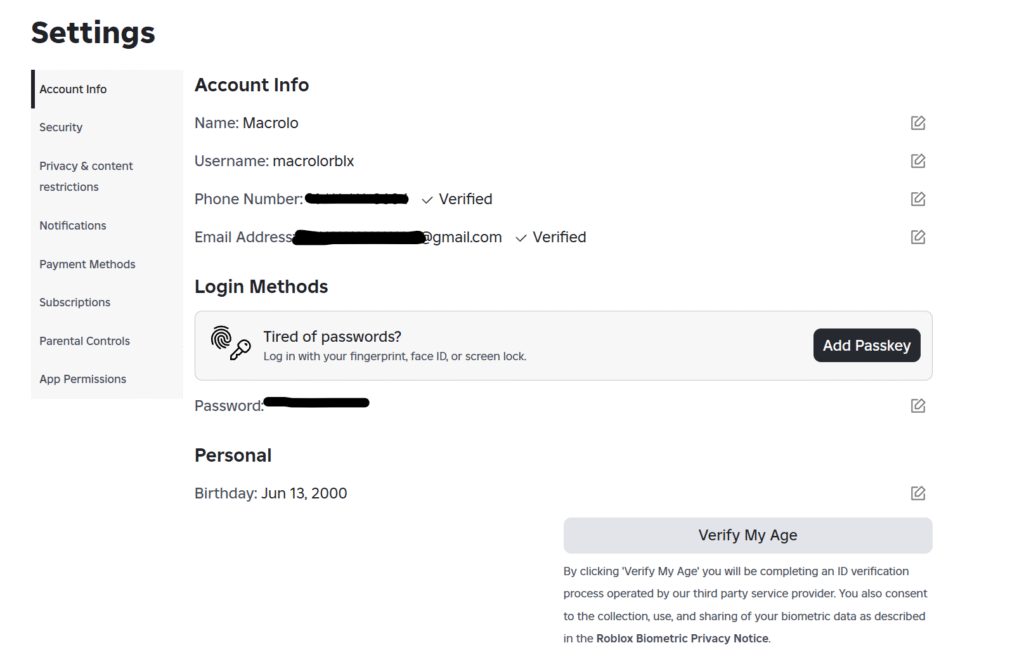
Now go to the “Account Info” tab. This is where your username, email, and birthday are stored. If your birth year is set to 2011 or earlier, great—you meet the age requirement.
If your account shows a birth year like 2012 or anything later, Roblox will automatically restrict you from enabling voice chat. There’s no way around this on that account—you’ll either need to edit your birthday (if it’s still changeable) or create a new account using a birthdate that makes you 13 or older.
Important tip: Once you set your birthday on Roblox, you usually can’t change it—so be careful when making a new account.
Step 3: Add and Verify a Phone Number
This is where the magic happens. On the same “Account Info” page, scroll down and look for the “Add Phone” button. It may also be located under the “Security” tab depending on whether you’re on desktop or mobile.
Click the button and enter a valid mobile phone number that you have access to. It must be able to receive a text message (SMS). After submitting, Roblox will send a 6-digit code to that phone. Once you get the code, type it in exactly as shown and hit “Verify.”
That’s it. Once your phone number is successfully verified and your age is set properly, Roblox will typically unlock voice chat automatically in your Privacy settings.
Step 4: Enable Voice Chat in Privacy Settings
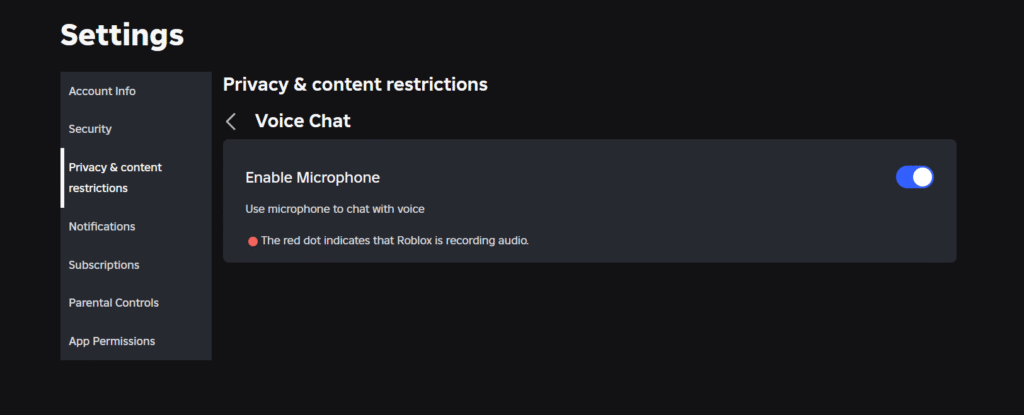
Now that everything is verified, go to the “Privacy” tab in your settings. Scroll down until you find the section called “Communication.”
Navigate to the “Voice Chat” section and you should now see a toggle switch labeled “Enable Microphone.” Turn it on, and a confirmation box might pop up asking if you’re sure you want to activate voice. Accept it—and boom, you’re done!
Sometimes the toggle doesn’t appear right away, even if you’ve done everything correctly. That’s okay. Try refreshing the page, logging out and back in, or waiting 5–10 minutes. In most cases, it will show up on its own once the system processes your phone verification.

